Window Trim Ideas and Styles That Fit Your House

Say you just paid for new windows. The glass is crisp, the frames are tight, and the installer left on a Friday. Saturday morning you notice the corners of the casing don’t quite meet, a dark gap runs down one side, and the caulk looks piped on by someone in a hurry.
That’s when most homeowners learn that window trim is not decoration. It covers the gap between frame and wall, steers water away outside, and decides whether a room looks built or patched. It’s also cheap next to the window itself, which is exactly why it gets rushed.
So what should your trim look like, what should it be made of, and who should install it? This guide gives you styles, widths by ceiling height, a material comparison, exterior rot prevention, a cost picture and the mistakes worth catching before the crew leaves. It’s one part of choosing the right windows for your house, and the part people notice last and regret most.
Executive Summary
Good window trim is three decisions: style, material and finish. Match the style to your house era, size the casing to your ceiling, and pick a material that survives where it lives. In a dry room, primed MDF or finger-jointed pine works. Outside, or near a shower, cellular PVC or primed solid wood is safer, because MDF swells when wet.
Three insights shape the rest. First, the exterior is where trim fails, and the cause is usually missing flashing or open caulk joints, not the board. Second, trimless windows look minimal but often cost more in finishing labor. Third, labor and prep drive cost far more than lumber, and quotes swing widely by region.
The biggest hesitation is "can I do this myself?" For interior casing, often yes, with a brad nailer and a miter saw. The cost section shows where a pro is the cheaper option.
What is window trim and what are its parts?
Window trim, also called casing or molding, frames a window and covers the gap between the frame and the wall. Inside, the parts are the casing on the sides and head, the stool (the shelf at the bottom), the apron beneath it, and the reveal, a small step between jamb and casing.
The reveal is the term people skip. Carpenters on Reddit describe about 1/8 to 3/16 inch, and it works as function, not just looks: it hides small jamb differences so the casing needn’t be flush. Some designs drop the stool and apron and wrap casing on all four sides. That’s picture frame trim, and it’s the easiest first project because every corner is the same cut. The sill below is its own topic, covered in our window sill guide.
Which window trim style fits my house, and how wide should it be?
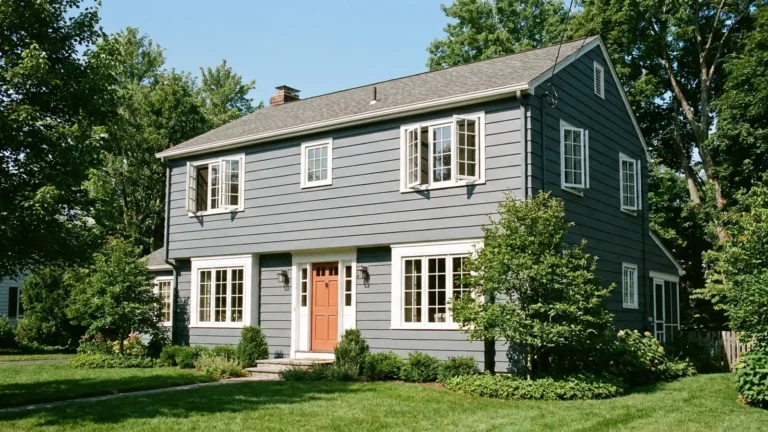
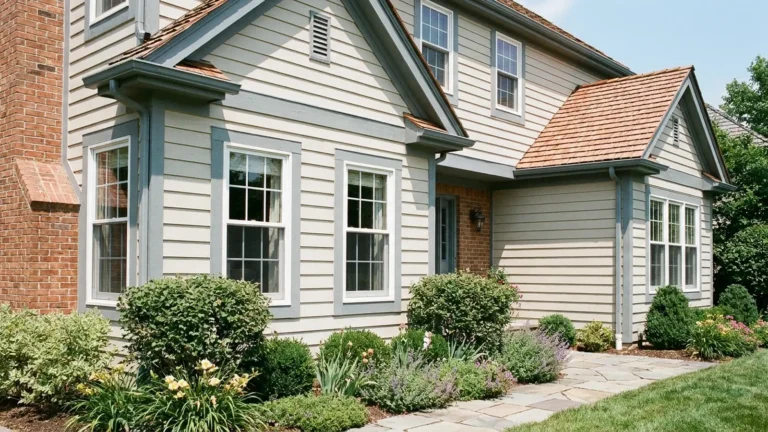
Match the style to the house era and to your door casing and baseboards. Craftsman is flat and boxy, Colonial is layered, Ranch is plain, Modern is slim. Scale width to the ceiling: roughly 2.25 to 3.5 inches at 8 feet, 3.5 to 4.25 at 9 to 10 feet, and 4.25 to 5.5 above.

You don’t need to name the style, you need consistency. If your doors and baseboards are flat, ornate window casing will look like a costume.
| Style | Look | Typical width | Best for (general guidance) |
|---|---|---|---|
| Ranch | Plain, flat | 2.5 to 3 in | 1950s to 1970s single-story |
| Craftsman | Flat boards, thick head | Common range, varies | Bungalows, clean remodels |
| Colonial | Layered profiles | 3 to 6 in | Traditional two-story |
| Provincial | Soft curves | 2.5 to 3.5 in | Transitional homes |
| Modern | Slim, square | Common range, varies, often slim | New builds |
Ranch, Colonial and Provincial widths come from Pella’s published ideas. Craftsman and Modern are common ranges that vary by builder, and the Best for column is general guidance. Ceiling widths come from a window maker’s sizing sheet, so treat everything as guidelines. Test with painter’s tape for a day. Thickness runs 1/2 to 1 inch, with 3/4 most common. For a plain builder-grade box, flat Craftsman-style window trim is the best upgrade per dollar. A bay window also favors flat profiles because they turn angles cleanly.
Should trim be painted or stained, and what color?
Paint for a forgiving finish, stain only when you have good solid wood. White or soft off-white is the safe color, slightly lighter than the walls. Use semi-gloss or satin sheen, since both wipe clean and resist scuffs. Painted trim hides filler and caulk well, while stained trim shows every flaw, so choose stain only when the wood and the joints deserve to be seen.
Finger-jointed pine, short pieces glued end to end, looks striped under stain and is made for paint. Painted window trim takes filler and a brush for dents, while a stained dent means a new board. If the house already has stained trim in good shape, match it. Paint a sample board and check it in morning and evening light before committing.
What is the best material for trim?
For dry interior rooms, primed MDF or finger-jointed pine are the budget picks. For anything exposed to water, choose cellular PVC or primed solid wood. MDF is cheap but swells when wet, and PVC costs more upfront but resists rot, holds paint fine and lasts far longer where moisture is a constant visitor.

| Material | Works in | Weak point |
|---|---|---|
| Primed MDF | Dry interiors | Swells, dents |
| Finger-jointed pine | Painted interiors | Joints show under stain |
| Solid wood (pine, oak, cedar) | Inside or out | Needs sealing, can rot |
| Cellular PVC | Exterior, baths | Costs more, expands in heat |
| Fiber cement | Exterior | Heavy, pro tools |
Myth to bust: PVC window trim can’t be painted. It can, though very dark colors in direct sun can warp it. If you’ll live in the house ten years, I’d pay the PVC premium outside. The first repaint earns it back.
How do you trim a window outside without inviting rot?
Start with flashing, not the board. Water should hit a drip cap or Z-flashing at the head, run down the wall face and never sit in a joint. Prime all sides of the trim, seal joints with exterior paintable caulk, and leave the bottom edge able to drain. This is general practice, so follow the window maker’s instructions and your local code.
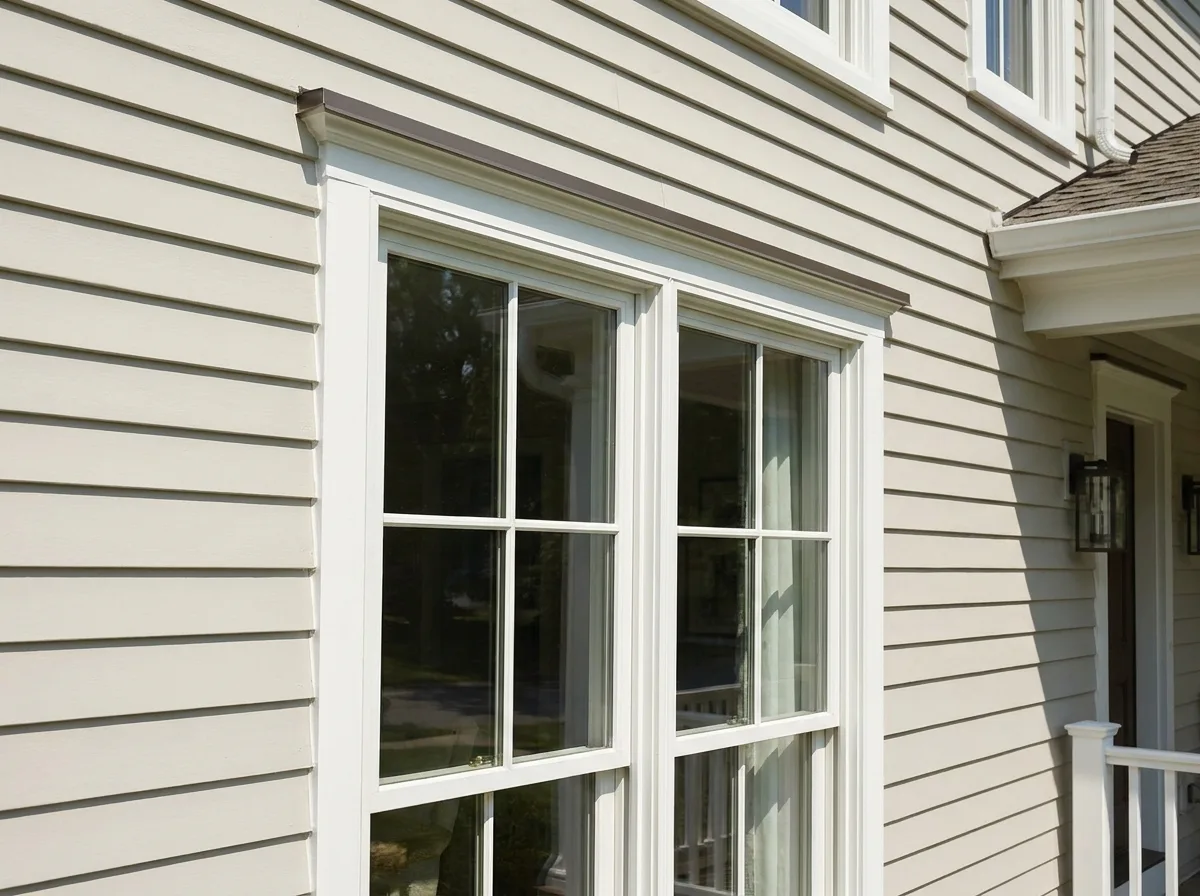
Most window trim guides give this a paragraph. It deserves more, because it’s where failures start. As general practice, the order is: sloped sill, flashing behind the siding at the top, trim over it, then caulk. Caulk is a weather seal, not a repair, and it ages out, so plan to renew it.
A common version of this mistake: a homeowner caulks a wide gap at the bottom to look tidy. Water gets in and can’t leave. Two winters later the board is soft. The fix is a small drainage path, caulk on the sides and top only. Near rebuilt flashing or roofline work, a pro is cheaper than replacing wet sheathing. Codes vary, so check yours and follow the window maker’s instructions. Ladder work on upper floors is a pro job.
What does window trim cost, and when is a pro cheaper?
Cost depends mostly on labor, prep and region, not lumber. Interior DIY is mostly boards, caulk and paint. Exterior jobs in real threads ran from about $2,500 for a two-story repaint with rot repair to a $15,000 quote for 11 windows plus eaves, driven by stories, rot and local rates. A pro is cheaper when rot, height or flashing is involved.
I couldn’t verify a national per-foot price. Real threads show the spread. One homeowner in a pricey metro reported a quote near $15,000 for trim on 11 windows plus eaves and doors, and replies said that felt high. Another described about $2,500 for a two-story trim repaint with rot repair in a cheaper area. Those are anecdotes, and a commenter put it well: an estimate from outside your area is worthless.
Exterior prep is what you pay for: scraping loose paint, priming rusty nail heads, replacing glazing putty, sanding paint lips. Rule of thumb: DIY interior casing if you own a brad nailer and a miter saw. Hire out upper floors, rot and flashing. And ask who trims after a window replacement before you sign. Quotes for new frames, like our vinyl windows price guide, often leave trim as an add-on.
Can you go trimless, and what mistakes ruin trim after a replacement?
Trimless uses a drywall return and looks clean, but it needs precise framing and a high-grade finish, so it often shifts cost to drywall labor. After replacements, the common failures are missing reveals, loose or chipped miters, caulk hiding bad joints, and no head flashing.
Commenters say trimless corners dent easily and need a level 5 finish. In an old plaster house, I’d skip it.
Walk the finished job with this checklist:
- Tap each corner. A good miter has no daylight.
- Check the reveal is even all around.
- Look for caulk thicker than a pencil lead. It’s covering something.
- Outside, confirm a drip cap or flashing at the head.
And one more myth: caulk can’t fix a bad miter. It fills a hairline, then cracks by spring.
How do you install casing yourself, and what about older homes?
For interior casing, mark a consistent reveal, cut mitered corners with a sharp fine-tooth blade, nail into framing, fill holes, caulk the wall edge and paint. Plan an afternoon for your first window, faster after that. In homes built before 1978, test for lead paint first and use lead-safe practices.
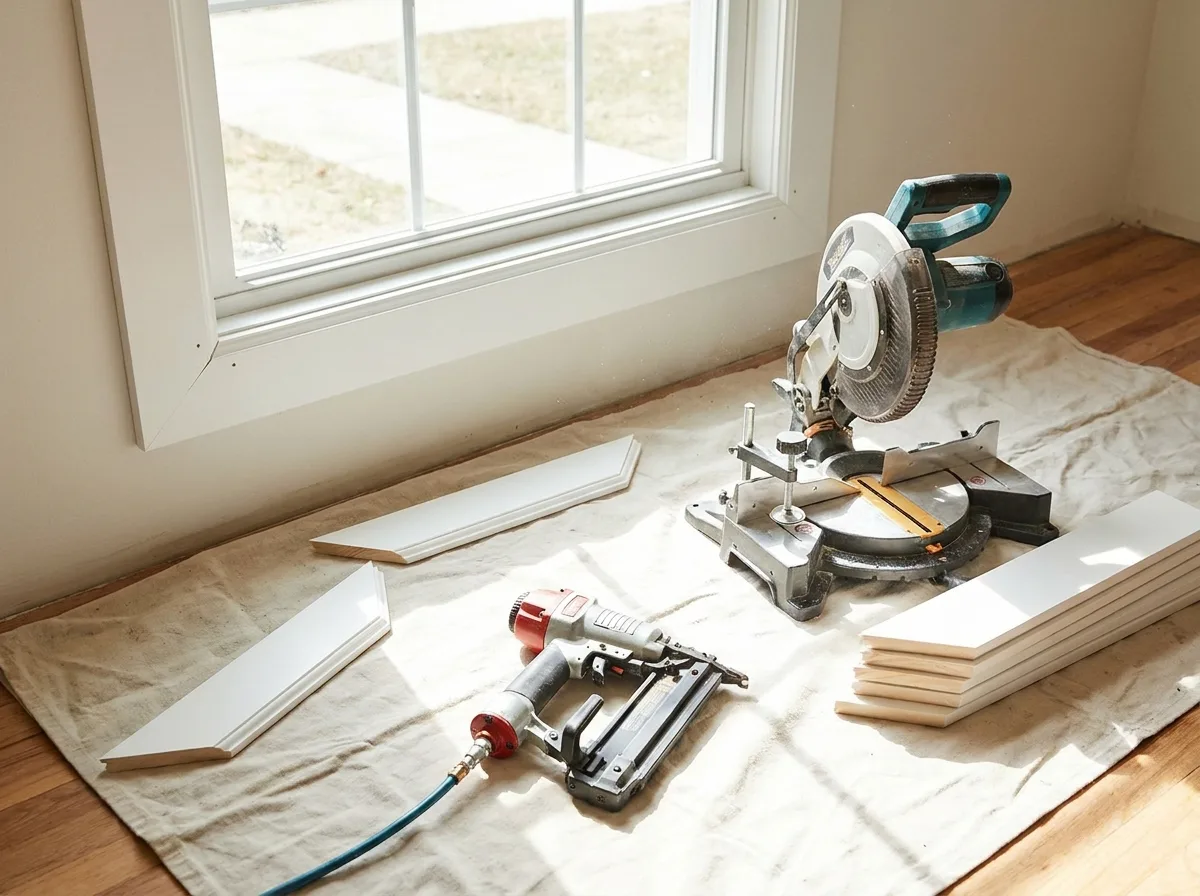
Steps: score the paint line and remove old casing slowly, mark the reveal, cut and fit the head first, then the sides, add stool and apron if needed, then nail, fill, caulk and paint. An 80-tooth blade gives cleaner cuts, a tip homeowners often share. Dry-fit everything, and cut a spare. A common version of this mistake: nailing only into drywall because it holds on day one. Months later the casing pulls away and the miters open. The fix is to find the framing with a stud finder and nail into it. Difficulty is moderate, and patience matters more than skill.
For old trim, the EPA’s Renovation, Repair and Painting rule requires paid contractors in pre-1978 homes to be lead-safe certified, while homeowners doing their own work are generally exempt unless renting out. Wet-scrape, never dry sand, and clean with a HEPA vacuum.
How do you keep your trim in good shape?
Inspect once a year, ideally in spring. Look for cracked caulk, peeling paint, soft spots and open joints. Re-caulk small gaps, touch up bare wood fast and wash off mildew before it stains. A tube of caulk and an hour of care now cost far less than replacing a rotted board and repainting later.
Press a screwdriver tip into the bottom edge of exterior window trim. If it sinks in, that’s rot, and it needs cutting out, not painting over. Paint fails first at the lowest, wettest corners.
Frequently Asked Questions
Should window trim match door casing and baseboards?
Usually in style, though not in width. Keeping one profile family makes the house feel consistent. Window casing can be narrower than baseboard height. Matching color and sheen matters more than exact dimensions. If your door casing is dated, updating all of it together looks better than mixing eras.
What trim is best for humid or coastal areas?
Cellular PVC or composite, because neither absorbs water. Primed, well-sealed solid wood works if you keep up the paint. Avoid MDF anywhere it can get wet, and use coated or stainless fasteners near salt air. Ask a nearby supplier what lasts in your climate, since conditions and codes vary.
Can PVC trim be painted?
Yes. PVC takes a quality exterior acrylic well when the surface is clean. The catch is dark colors, which absorb heat in direct sun and can make the board expand or warp. Lighter shades are safer. Follow the board maker’s paint guidance before you buy.
What is a reveal and do I need one?
A reveal is the small step, often 1/8 to 3/16 inch, between the jamb edge and the casing. You don’t strictly need one, but it hides small jamb flaws and gives a clean shadow line. Without it, any wobble in the jamb shows. Many carpenters treat it as standard.
How much does window trim cost?
It depends on materials, labor, height, rot repair and region, so one number would mislead you. Interior DIY is mostly boards, caulk and paint. Exterior jobs are labor-heavy and quotes vary widely. Get several local quotes and ask what prep is included. Our vinyl windows guide covers the surrounding costs.
Is MDF okay outside?
No. MDF is wood fiber and glue, and it swells and crumbles when water gets in, even painted. Dry interior rooms are fine. Outdoors, in baths and near sinks, use cellular PVC, fiber cement or well-primed solid wood. If MDF is all you have, keep it inside.
Do I need a stool and apron?
No. Many windows use picture frame casing on all four sides. The stool gives a shelf for plants and a traditional look, and the apron finishes the underside. Craftsman and Colonial homes often want both, while ranch and modern homes may not. Our window sill guide helps you decide.
Is painted or stained trim longer lasting?
Neither wins outright. A paint film protects wood and is easier to touch up, so painted trim often looks fresh longer. Stain shows grain but needs good wood and a clear topcoat, and sun fades it. Outdoors, a sealed bottom edge and sound caulk matter more than the finish type.
Can I trim over plaster walls?
Yes, with extra work. Plaster is often uneven, so casing may need scribing, shims or flexible caulk at the edge. Pre-drill to avoid cracking brittle plaster. Older plaster walls may carry lead paint, so test before any sanding. Dry-fit each piece first, and scribe the back edge so it sits tight against the wall instead of rocking on a high spot.
Myth: can caulk fix gaps from poor miters?
No. Caulk fills hairlines and seals edges, but it can’t hold a joint closed. A wide gap packed with caulk cracks as the wood moves with the seasons. The real fix is recutting the miter or adding a shim and glue. Treat caulk as the finishing touch, not the repair.
Conclusion
Back to that Saturday gap. The fix isn’t more caulk. Good window trim comes down to four decisions: a style that matches the house, a width that fits the ceiling, a material that handles moisture, and an installer who treats trim as part of the job, not leftover work.
Your next step is simple. Walk every window this weekend with a screwdriver, a flashlight and a tube of caulk, and write down what you find.
Still choosing the windows themselves? Start with the double hung window guide or see how a casement window changes the frame. Which window in your house would you fix first?